Our PrestaShop Module allows you to get paid in all our supported cryptocurrencies in your PrestaShop Store, with a simple set-up. First you need to create an account.
In this page we will guide you throughout the configuration and installation of our official PrestaShop Module.
Prerequisites
Before installing the BlockBee module, ensure you have:
- A PrestaShop store with admin access
- Downloaded the BlockBee PrestaShop Module
- A BlockBee API Key
- Wallet addresses configured in your BlockBee Dashboard
Installation Steps
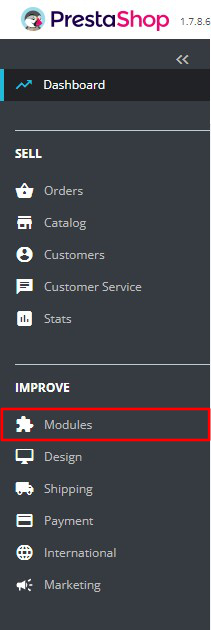
Step 1: Access Modules Menu
Download our PrestaShop Module and access your PrestaShop store's admin area. Click on Modules to open a dropdown menu.
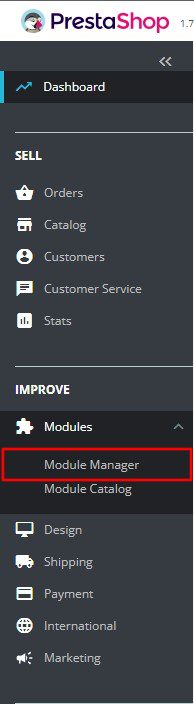
Step 2: Open Module Manager
In the dropdown menu click Module Manager.
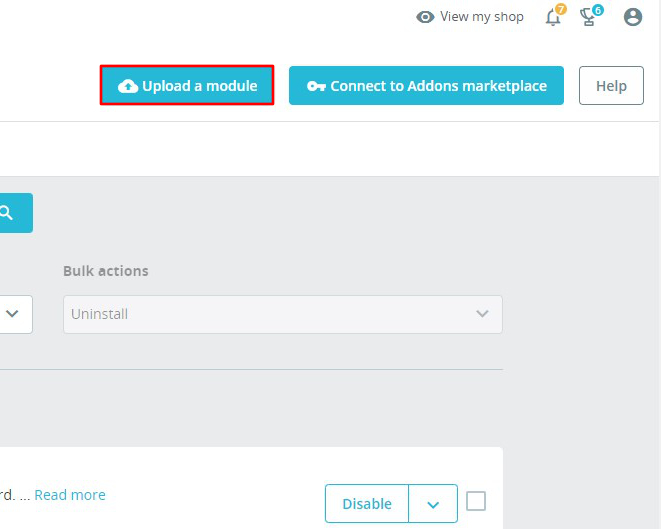
Step 3: Upload Module
After clicking Module Manager you will enter a new screen where you must click Upload a module.
Step 4: Select Module File
You can either drop the zip file in the modal's red area or click select file to pick from your file system.

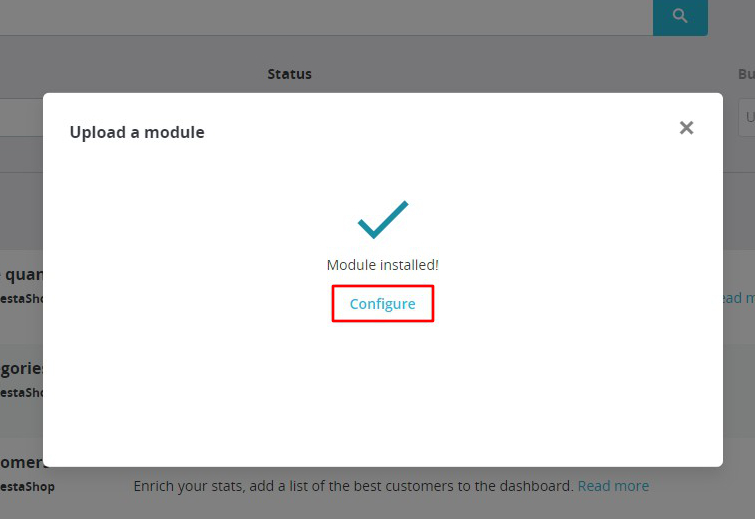
Step 5: Configure Module
Once the installation is completed, click Configure.
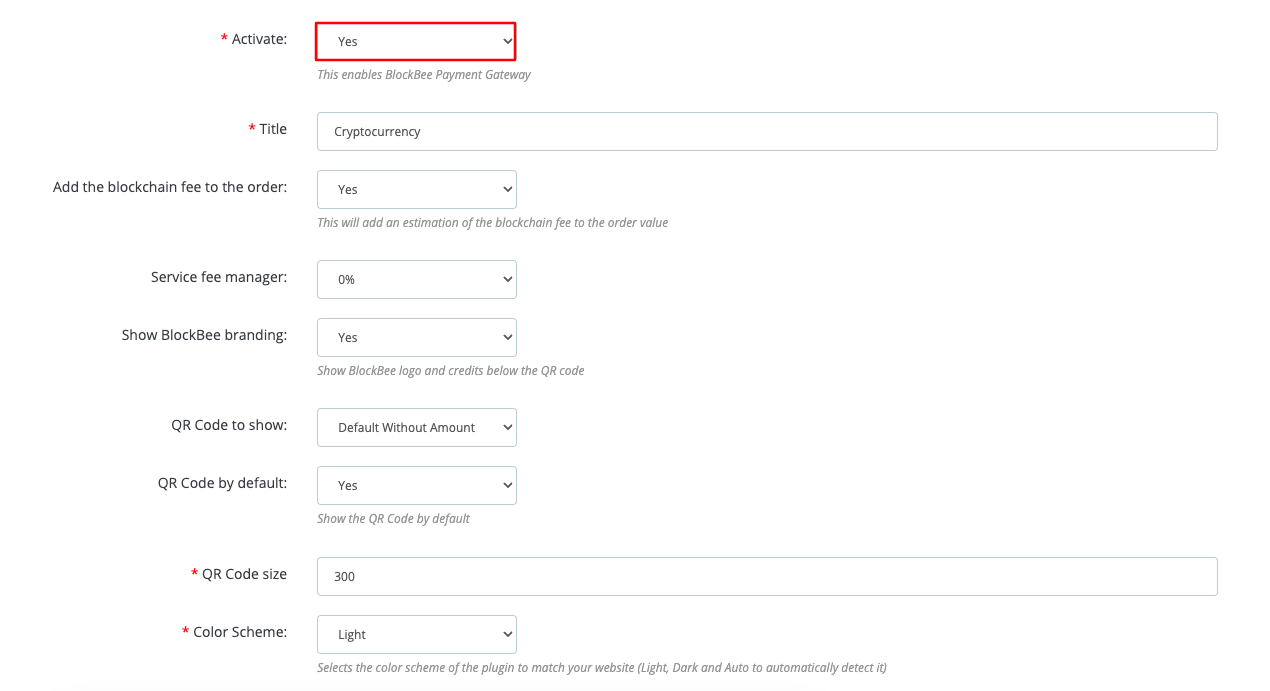
Step 6: Activate the Module
First, you need to activate the Module. You can configure the rest of the settings to fit your needs.
Step 7: Configure API Key and Cryptocurrencies
Scroll down the settings page so you can see the remaining fields that are mandatory to set up.
API Keys: Paste the API Key you obtained from your BlockBee Dashboard.
Select cryptocurrencies: Select the cryptocurrencies you want to accept in your PrestaShop Store.
Tip: You may use CTRL + Mouse click on Windows or Command + Mouse click on Mac to select multiple cryptocurrencies.

Step 8: Set Up Cronjob
Here you can define your Cronjob Nonce, though one is already defined by default for you. The automatic conversion and automatic order cancelation need a defined Cronjob to function. For that you must set-up a Cronjob that calls the provided link every 5 minutes. If you aren't sure how this works, contact your hosting provider.
Important: The Cronjob is required for automatic conversion and order cancellation features to work properly. Make sure to set it up to run every 5 minutes.

Step 9: Save Settings
Finally check again your settings and make sure you hit Save before closing the page.
Configuration Complete!
Congratulations! Your PrestaShop store is now ready to accept cryptocurrency payments through BlockBee. Customers will be able to select crypto as a payment method during checkout.
Remember: Ensure your wallet addresses are properly configured in the BlockBee Dashboard for each cryptocurrency you've selected, and verify that your Cronjob is running correctly.
Next Steps
- Test the checkout process to ensure everything works correctly
- Verify that the Cronjob is running every 5 minutes
- Configure payment settings in your BlockBee Dashboard
- Set up exchange automation if needed
- Monitor your transactions in the BlockBee Dashboard