In this article we will explain how to set up BlockBee's OpenCart Extension in your OpenCart Store. First you will need to create and set up your account in our BlockBee Dashboard.
After setting up your BlockBee account, you will need to install the extension in your OpenCart Store. Currently, our OpenCart Extension supports both OpenCart 3 and OpenCart 4. You will need to download the right file for your version from here.
Make sure the name of your file looks like this: blockbee.ocmod.zip
Prerequisites
Before installing the BlockBee extension, ensure you have:
- OpenCart 3 or OpenCart 4 installed with admin access
- Downloaded the correct BlockBee OpenCart Extension for your version
- A BlockBee API Key
- Wallet addresses configured in your BlockBee Dashboard
Installation Steps
Step 1: Access Extensions Installer
Having the right file for your OpenCart Store, you will need to log-in into your administration area to install the extension. While in the administration area, click Extensions to open a dropdown, and then click Installer.

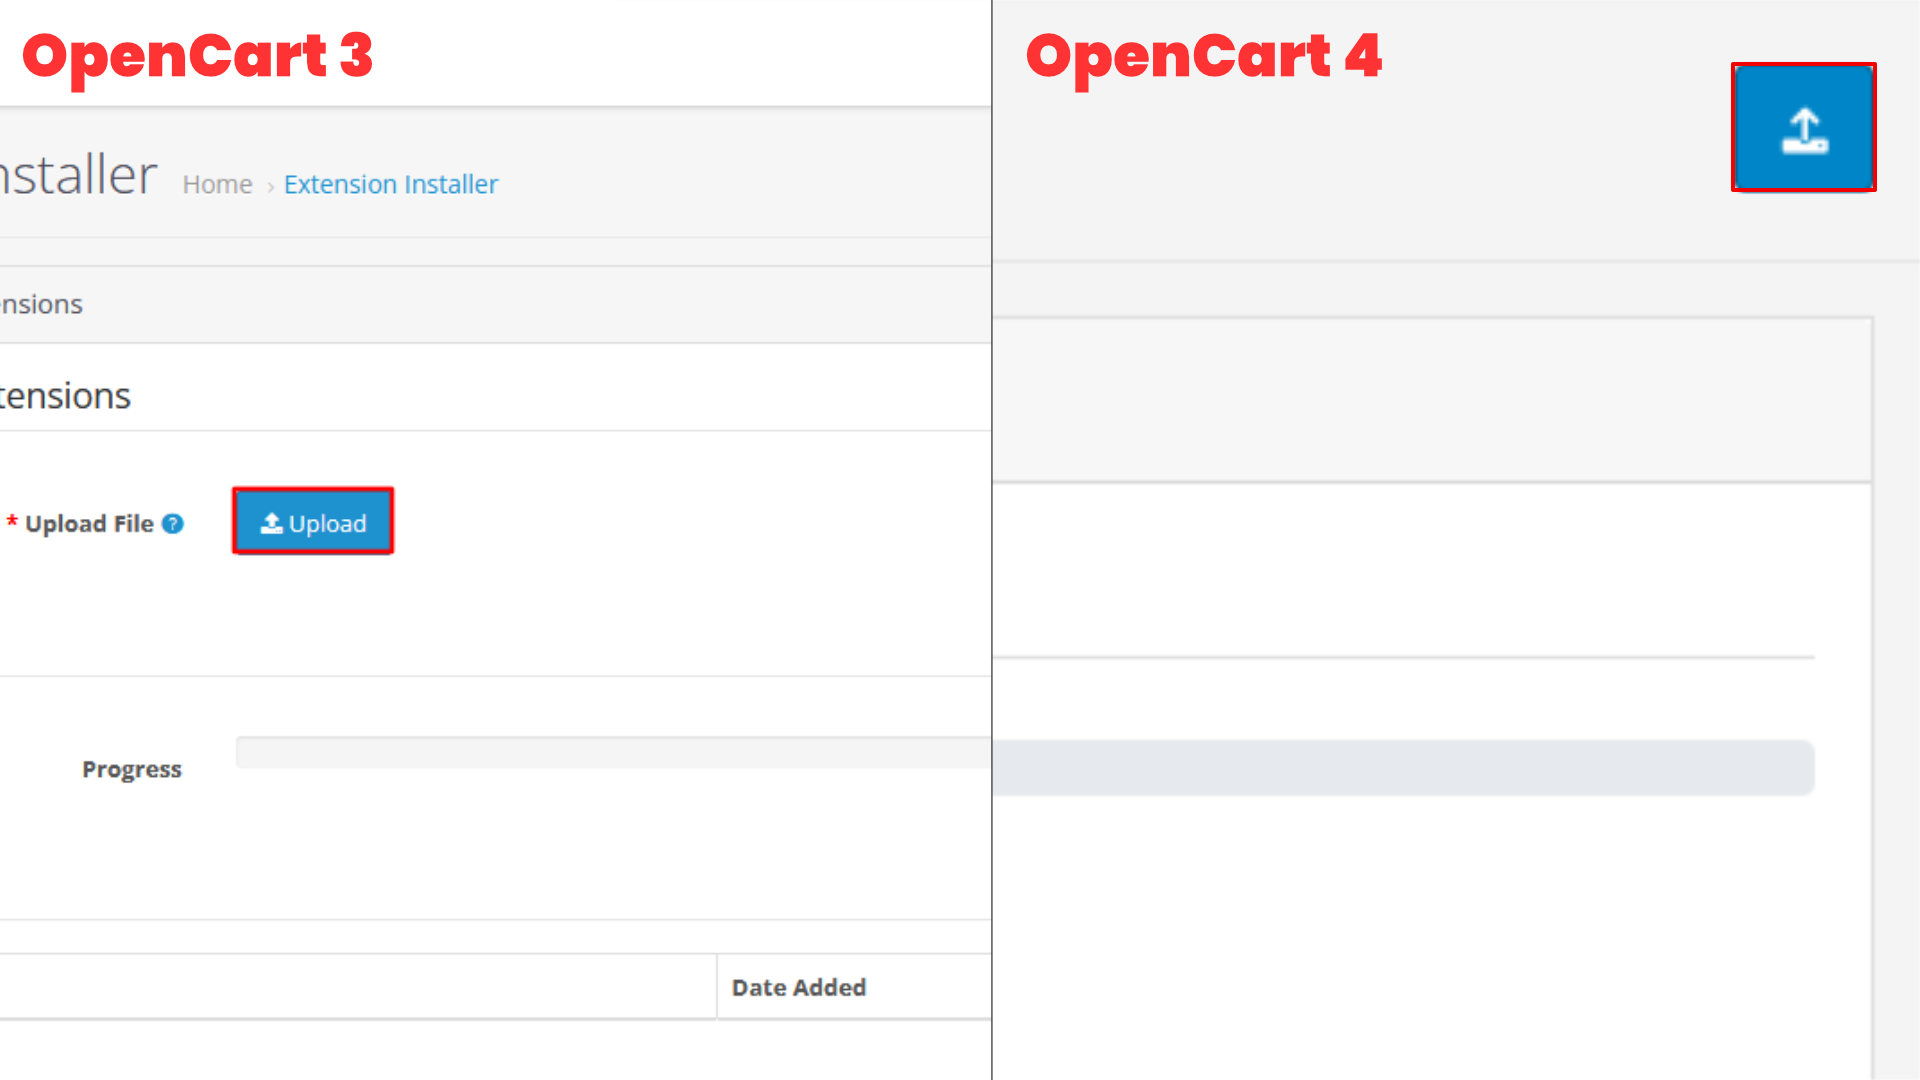
Step 2: Locate Upload Button
After clicking Installer, click the upload button. In OpenCart 3 and OpenCart 4 the upload button is in different places, check the image below to see their location.
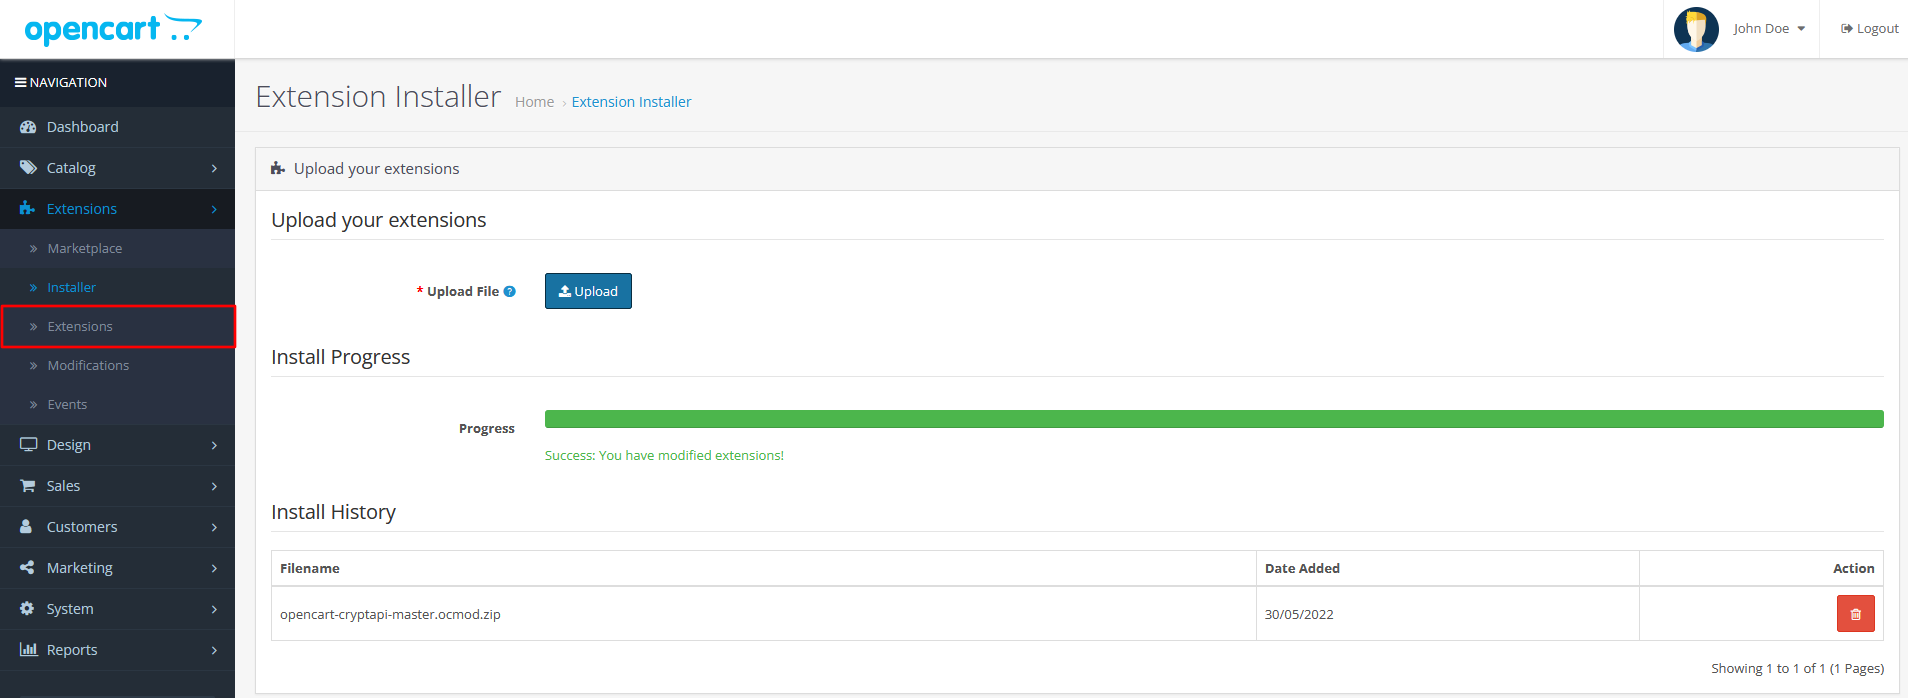
Step 3: Upload Extension File
Clicking this button will open a pop-up. Upload the file to install the extension and wait for the process to complete.
Note: In OpenCart 4 you will need to install the extension here by clicking in the green button in Action area.
Finally, click Extensions.
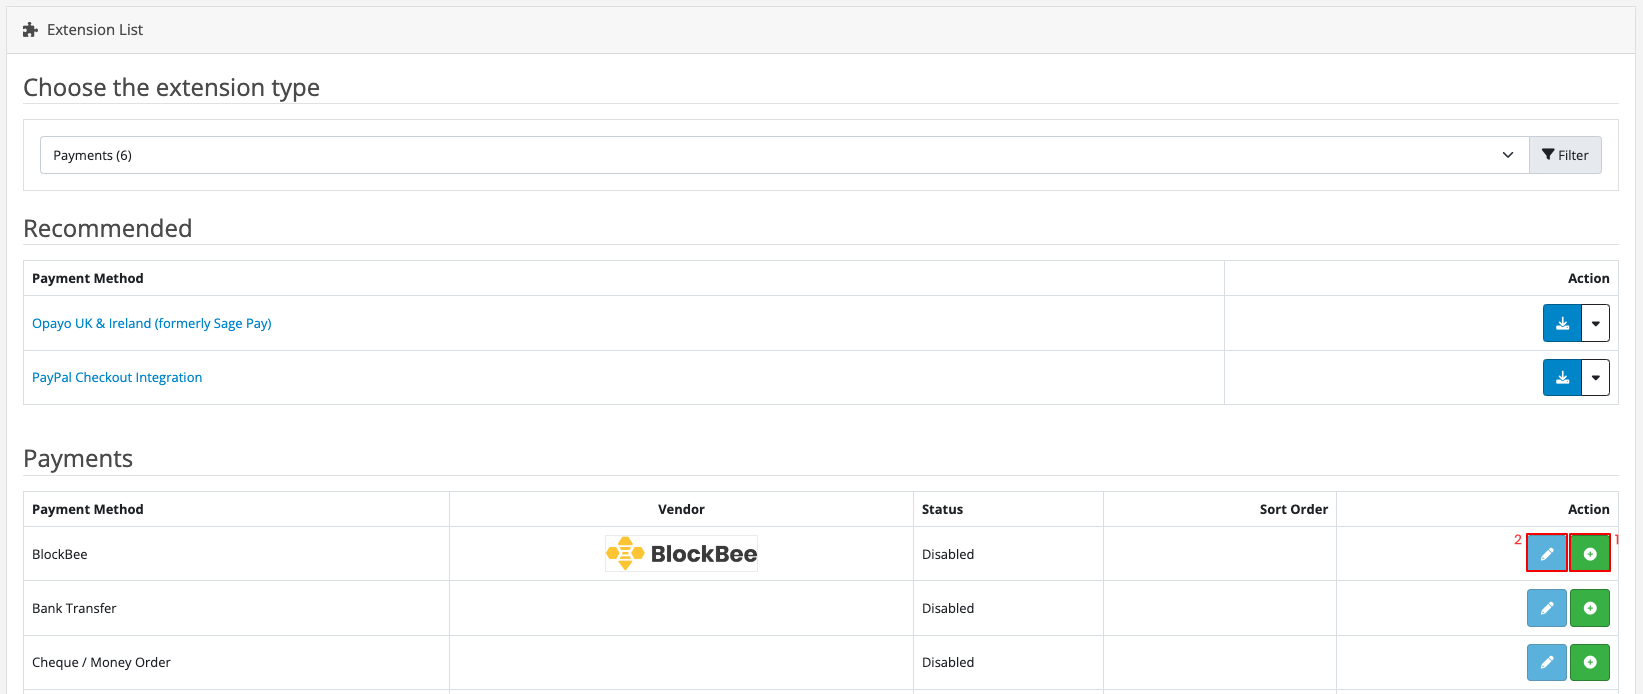
Step 4: Enable BlockBee Extension
Inside Extensions, select Payments in Extension Type and then in the list select the BlockBee Extension. Finally, click in the green button to finish the installation and, to change the extension settings, click the blue button with a pencil inside.
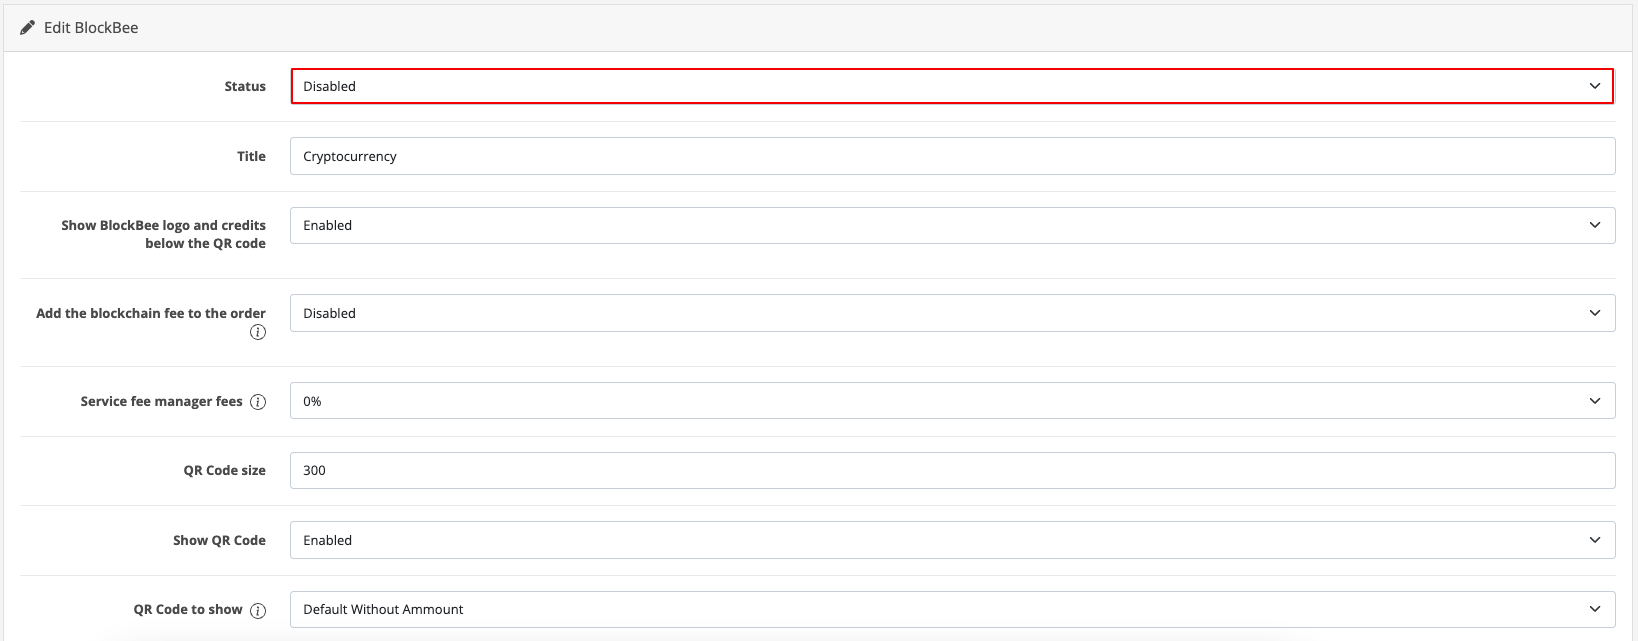
Step 5: Enable Status
In the settings area, it's very important to set the Status (highlighted in the image below) to Enabled, otherwise the extension won't work. The remaining settings you can customize to fit your needs.
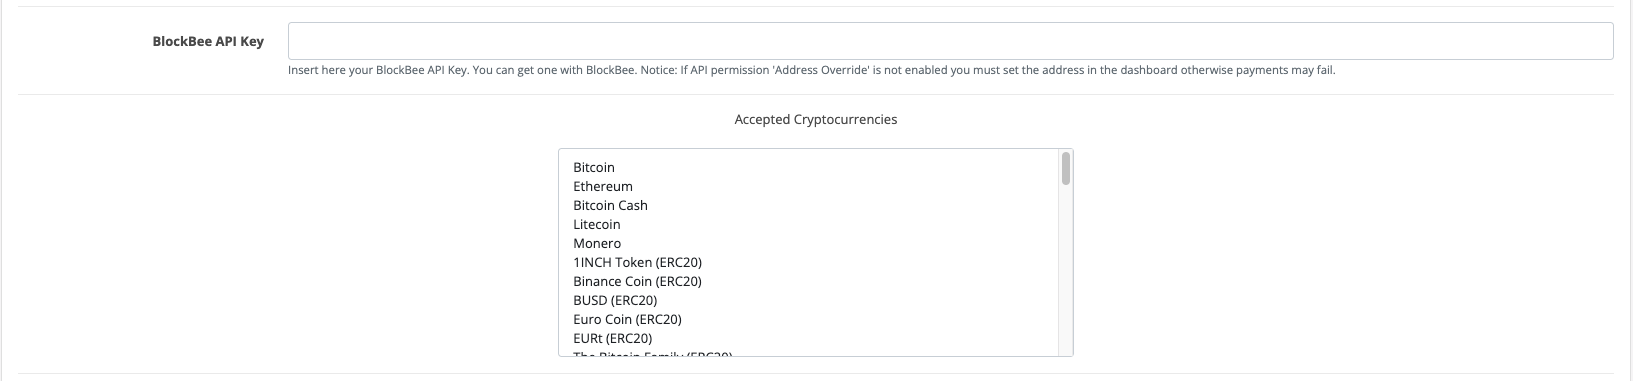
Step 6: Configure API Key and Cryptocurrencies
If you scroll a bit, you will see more settings which are very crucial for the extension. First, you need to paste the API Key you got from our dashboard in the API Key field. You will also need to select the cryptocurrencies you want to accept (to select multiple cryptocurrencies CTRL + click on Windows / CMD + click on Mac).
Important: Don't forget to set up the addresses in the dashboard, otherwise the extension won't work.
Step 7: Save Configuration
After all done you can save the settings and your OpenCart Store is now ready to accept cryptocurrency payments.

Configuration Complete!
Congratulations! Your OpenCart store is now ready to accept cryptocurrency payments through BlockBee. Customers will be able to select crypto as a payment method during checkout.
Remember: Ensure your wallet addresses are properly configured in the BlockBee Dashboard for each cryptocurrency you've selected.
Next Steps
- Test the checkout process to ensure everything works correctly
- Configure payment settings in your BlockBee Dashboard
- Set up exchange automation if needed
- Monitor your transactions in the BlockBee Dashboard