If you want to make requests to our API, you will need an API Key to send in the apikey parameter. Creating one is rather simple, but before you will need to create a Profile.
To learn more about the differences between API Key versions, check out our API Key V1 vs V2 comparison.
Step 1: Navigate to Settings
While in the BlockBee's Dashboard, click Settings.
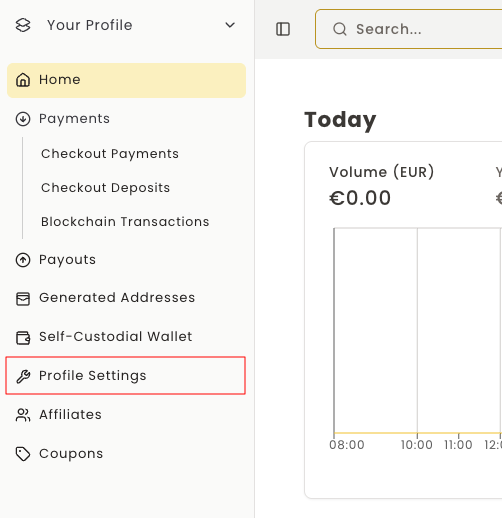
Step 2: Access API Key Section
In the Settings area, under the Profile Settings section, click API Key.

Step 3: Configure Permissions
Creating an API Key is straightforward. Simply select the permissions you want to enable. Currently, there is one permission available:
Address Override: Lets you specify your wallet address directly in the API request using the address parameter. If you don't need this feature, you can leave it disabled.
To create the API Key, click Create API Key and enter the OTP code to complete the process.

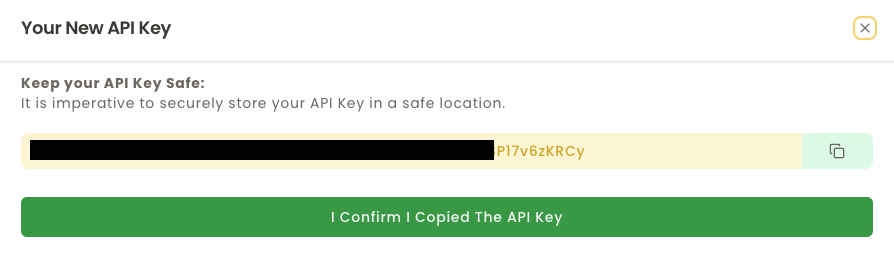
Step 4: Save Your API Key
After the previous step, a pop-up will show with your API Key. In this step you only need to copy the API Key and store it in a safe place.
Important: BlockBee does not store your API Keys, so if you lose your API Key, you will need to generate a new one using the Generate new API Key button.
Using Your API Key
Your API Key is now ready to use! You can include it in your API requests using the apikey parameter or as a header.
Security Tip: Keep your API Key secure and never expose it in client-side code or public repositories. Treat it like a password.